We Need Your Help In This Friday’s Dinner Hosting at Christ House in Alexandria!
July 27, 2015 News
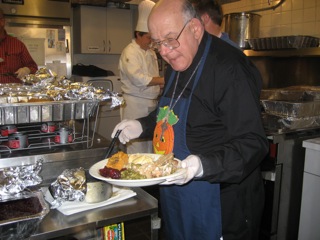 St Raymond of Peñafort Christ House Committee is hosting dinner this Friday at the Christ House in Alexandria.
We are in still in need of volunteers to cook up OR bake any of the following items for the dinner St. Raymond’s is hosting this Friday, 31 July, at Christ House in Alexandria:
* 18 pkgs of Chicken quarters, thighs, …or drumsticks
* 3 batches of Potato Salad
* 7 Bush beans, lg cans, 16 oz
* 2 Watermelons, lg
* 4 units of 2 dozen Cookies each
Recipes are posted below and your Item(s) may be delivered to St. Raymond’s parish hall/kitchen this Thursday, July 30, between 7:30 am and 7:30 pm.
You may text/email Maria Sánchez-O’Brien with item(s) you volunteer to provide or with any questions at: 571-259-7379 (c) or pmobrisan@gmail.com.
Chocolate Chip Cookies
Hands-on time: 12 mins.
Baking time: 12 mins.
Total time: 36 mins.
Yield: 36 cookies
Ingredients
*2/3 cup light brown sugar, firmly packed
*2/3 cup granulated sugar
*1/2 cup unsalted butter, right from the fridge, or at room temperature
*1/2 cup vegetable shortening
*1/2 teaspoon salt
*2 teaspoons vanilla extract
1/4 teaspoon almond extract, optional
*1 teaspoon apple cider vinegar
*1 teaspoon baking soda
*1 large egg
*2 cups King Arthur Unbleached All-Purpose Flour
*2 cups semisweet chocolate chips
directions
Preheat the oven to 375°F. Lightly grease (or line with parchment) two baking sheets. OR preheat your pizza stone. smile emoticon
1) In a large bowl, combine the sugars, butter, shortening, salt, vanilla and almond extracts, vinegar, and baking soda, beating until smooth and creamy.
2) Beat in the egg, again beating till smooth. Scrape the bottom and sides of the bowl with a spatula to make sure everything is thoroughly combined.
3) Mix in the flour, then the chips.
4) Use a spoon (or a tablespoon cookie scoop) to scoop 1 1/4″ balls of dough onto the prepared baking sheets, leaving 2″ between them on all sides; they’ll spread OR pat them down w/a TBSP to make a big fat cookie out of your rolled dough balls.
5) Bake the cookies for 11 to 12 minutes, or up to 15, till their edges are chestnut brown and their tops are light golden brown, almost blonde. Remove them from the oven, and cool on the pan till they’ve set enough to move on a metal spatula without breaking. Repeat with the remaining dough.
And, voila!
How to make Creamy Potato Salad:
6 medium potatoes (2 pounds), diced and cooked
6 hard-boiled eggs, chopped
3 stalks celery, chopped
1 cup sweet pickle relish
1/2 cup onion, chopped
1 1/4 cups mayonnaise
1 tablespoon white vinegar
1 tablespoon lemon juice
1 tablespoon prepared mustard
1 tablespoon sugar
salt and pepper to taste*
*Start with about a teaspoon of salt and a half-teaspoon of pepper, adding more to suit yourself. Me, I use two teaspoons of salt.
Take your potato salad a step further for bonus homemade points by making your own mayonnaise and mustard!
It’s much easier than you might think to whip up your own mayonnaise and mustard, and the great thing about making your own is you can flavor it to your specific tastes, creating gourmet-style condiments.
My honey-dijon is based on the dijon recipe below. I use a variation based on this recipe to make a garlic mayonnaise.
How to make Homemade Honey-Dijon Mustard:
2 cups dry white wine
1 large onion, chopped
1 tablespoon minced garlic
1/4 cup dry mustard
2 tablespoons cornstarch
1 tablespoon olive oil
1 teaspoon salt
2/3 cup honey
Combine wine, onion, and garlic in a small pot. Heat to boiling and simmer 5 minutes. Cool; strain solids. Place the dry mustard and cornstarch in the small pot and add a small amount of the strained liquid, stirring until smooth, gradually adding the rest. Stir in oil, and salt. Heat slowly until it starts thickening and bubbling, stirring constantly for 5 to 10 minutes. Stir in honey. Turn off heat and cool. Store in a glass jar. Keep refrigerated. Chill completely before using. The mustard will continue to thicken to a spreadable consistency as it chills. Double or triple recipe as needed. (Keeps well for about a month.)
How to make Homemade Garlic Mayonnaise:
2 pasteurized egg yolks
2 tablespoons lemon juice
1 tablespoon white vinegar
1 tablespoon garlic powder*
1 1/2 teaspoons salt
1 teaspoon sugar
1 teaspoon prepared mustard
1 cup avocado/vegetable oil
1/2 cup extra light olive oil
*Leave out the garlic if you don’t want a garlic mayonnaise.
Place everything but the oil in a blender. Blend adding 1/4 cup of the oil at a time. (Use the lightest oils for the mildest taste–avocado and extra light olive oil are best.) As you add the oil and blend, the mixture will thicken. You may need to stick a knife down into the blender (with the blender turned off!) and push down the oil as you add it in increments then continue to blend. Transfer to a glass jar for storage. Double or triple the recipe depending on how fast your family goes through mayo. Keep refrigerated. (Keeps well for about two weeks.)
This mayo recipe turns out amazing. It turns right into mayonnaise. If you’ve never made mayonnaise before, it’s a bit of a stunner to realize there’s no dairy in there. Mayonnaise is mostly whipped oil, which you might not really want to think about too often, but it’s great on sandwiches! Or in potato salad! (The above mayo recipe makes just about the right amount for this potato salad recipe.)
On Jul 18, 2015 12:00 AM, “Patrick O’Brien” <pmobrisan@gmail.com> wrote:
Barbecued Chicken on the Grill Recipe
Prep time: 5 minutes
Cook time: 1 hour, 45 minutes
Yield: Serves 4-6
Note: Chicken thighs and legs will hold up better to long, slow heat whereas chicken breasts do better grilled after being marinated so as to avoid their drying out. If you barbecue breasts, place them on the coolest part of your grill.
The recipe below works well with fairly large chicken pieces (like the main pieces from a 4 to 5 pound whole chicken). Smaller chicken pieces may require a shorter cooking time. And wings will always be done before the other larger pieces.
A note about the skin. It’s best to barbecue chicken with the skin on, even if you do not plan to eat it as the skin will protect the chicken pieces from drying out.
Ingredients
+ 4 pounds of your favorite chicken parts (legs, thighs, wings, breasts), skin-on
+ Sea Salt
+ Vegetable oil (e.g. olive)
+ 1 cup barbecue sauce, store-bought or homemade
Method–5 Steps
1) Coat the chicken pieces with oil and sprinkle salt lightly over them on all sides. Prepare your grill for high, direct heat. If you are using charcoal or wood, make sure there is a cool side to the grill where there are fewer coals.
2) Lay the chicken pieces skin side down on the hottest side of the grill in order to sear the skin side well. Grill for 5-10 minutes, depending on how hot the grill is (you do not want the chicken to burn). Once you have a good sear on one side, move the chicken pieces to the cooler side of the grill. If you are using a gas grill, maintain the flame on only one side of the grill, and move the chicken pieces to the cooler side, away from direct flame. Reduce the temp to low or medium low (between 250°F and 275°F, no more than 300°F). Cover the grill and cook undisturbed for 20-30 minutes.
3) Turn the chicken pieces over and baste them with with your favorite barbecue sauce. Cover the grill again and allow to cook for another 15-20 minutes. Repeat, turning the chicken pieces over, basting them with sauce, covering, and cooking for another 10-30 minutes. NOTE that timing will depend on your grill set-up, the size of your chicken pieces, and how cold your chicken pieces are to start with! If you are grilling smaller pieces of chicken on a charcoal grill, they may be done much earlier. The goal is to maintain a low enough grill temp so that the chicken cooks “low and slow”.
4) The chicken is done when the internal temperature of the chicken pieces are 165°F for breasts and 170°F for thighs. Test by using a meat thermometer or insert the tip of a knife into the middle of the thickest piece and if the juices run clear, the chicken is done. If the chicken isn’t done, turn the pieces over and continue to cook at a low temperature. If you want to finish with a seared look, use the hot side of the grill. To do this, put the pieces, skin side down, on the hot side of the grill and allow them to sear and blacken slightly for a minute or two.
5) Paint with more barbecue sauce and serve.